When I was first starting out, growing from seed seemed daunting, but with a few tips and the right equipment, it’s pretty easy. Right now, lots of people are trying to figure out how to start seeds indoors, so I thought I would answer the top questions about it.
Do you really need to start seeds indoors?
Whether to start indoors or direct sow in the garden is a personal choice. The reason for starting indoors is to get a head start on the growing season and get everything fruiting sooner. Especially for those of us with harsh winters. This is less of a problem for people with milder climates that can grow more things year-round.
I like to start as much as I can indoors because I want to see flowers sooner and I want to eat tomatoes sooner. I have made the mistake of planting too early and then having to cover plants every night. It’s a pain. I now err on the side of caution when transplanting to make sure all danger of frost has passed, sometimes a week or two after others will plant. Because I start my warm weather plants inside, I am not behind on the growing season at all by doing this.
Another reason I start some things indoors is because I can’t plant outdoors quite yet because I have others things still growing there. So, for example, I can’t direct sow my zinnias on the frost date because I have spring flowers growing where they will grow (tulips, ranunculus, poppies, etc.). So, if I didn’t start them indoors, I would be way behind by direct sowing several weeks after the frost date whenever the other flowers finished blooming. It’s more challenging to be a three-season gardener and balance all of this.
If you don’t have room or money to buy lights, don’t worry about it, just direct sow everything.
As a general rule of thumb, the things you absolutely do not want to start indoors and transplant are any root vegetable. The roots can’t be disturbed. So, that’s radishes, carrots, parsnips, etc. Everyone says not to transplant cucumbers and squash, but I have pretty good luck doing it. I start them in larger pots, so that I don’t have to pot up, thereby disturbing them less.
On the flip side, I would never plants beans indoors, because they grow so fast and it’s so much easier to direct sow.

When to start seeds indoors
I have a whole post just on the topic of when to start seeds. Or, skip it and go right for the good stuff and download my free week-by-week guide of what to start on which date.
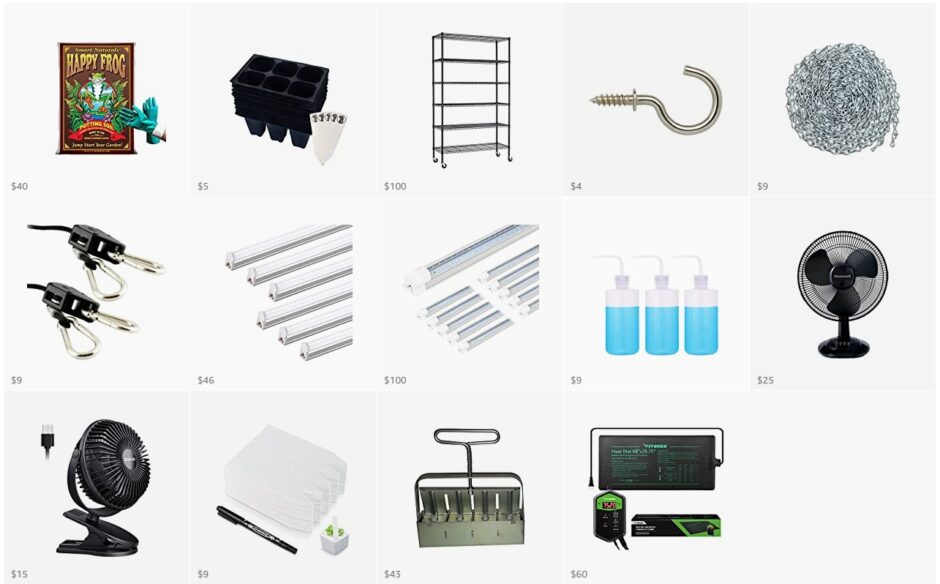
Equipment you need to start seeds indoors
- Large flat surface or shelfing unit – This shelf provides a lot of space to grow.
- Trays – 1020 trays without holes. Only buy heavy-duty ones because the flimsy ones are useless once the plants are bigger. These trays from Bootstrap Farmer are the best and will last forever. You will put your planting trays or pots in here to bottom water.
- Humidity Dome – You will need to put this over the trays until the seeds germinate. I love this one from Bootstrap Farmer.
- Planting trays, small pots or any plastic containers (solo cups, whatever you have). I save all of the plastic pots that I get from nurseries and I bought some smaller seed starting trays.
- Seed starting mix or potting soil – You’re supposed to use a sterile seed starting mix, but I have better luck with regular potting soil. This is the single thing that will make the most difference in the health and growth of your plants. This Fox Farms potting soil is my favorite.
- Seed warming mat with timer – Some seeds require higher temperatures to germinate. Warming mat.
- Fans – Having some movement and wind will help recreate the environment outside and make your seedlings stronger. I like this small clip-on fan.
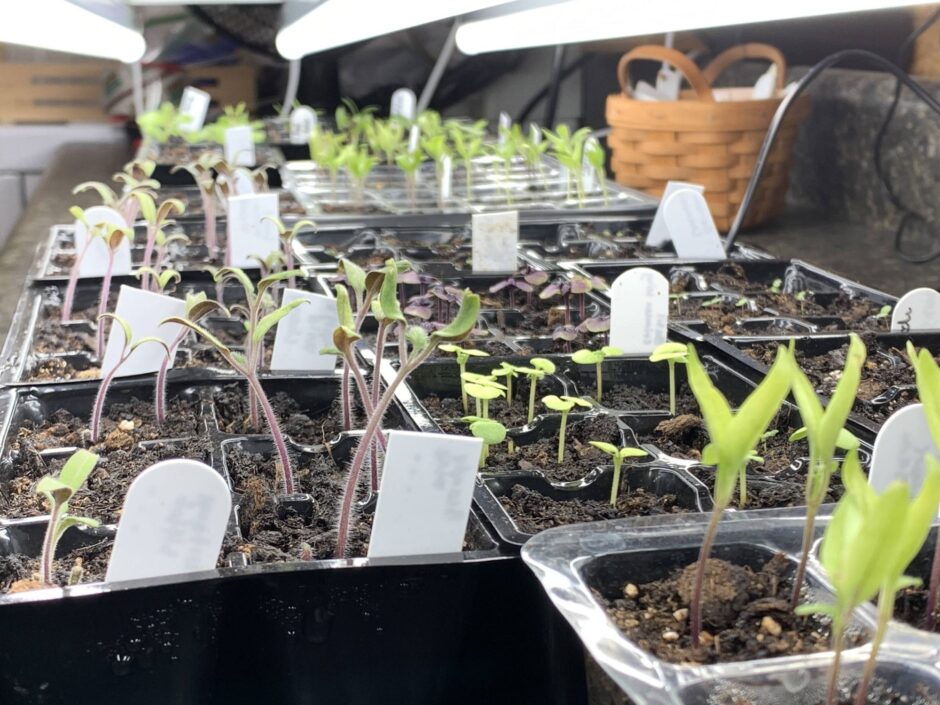
- Lights – See my DIY grow light tutorial.
Step by Step – How to start seeds indoors
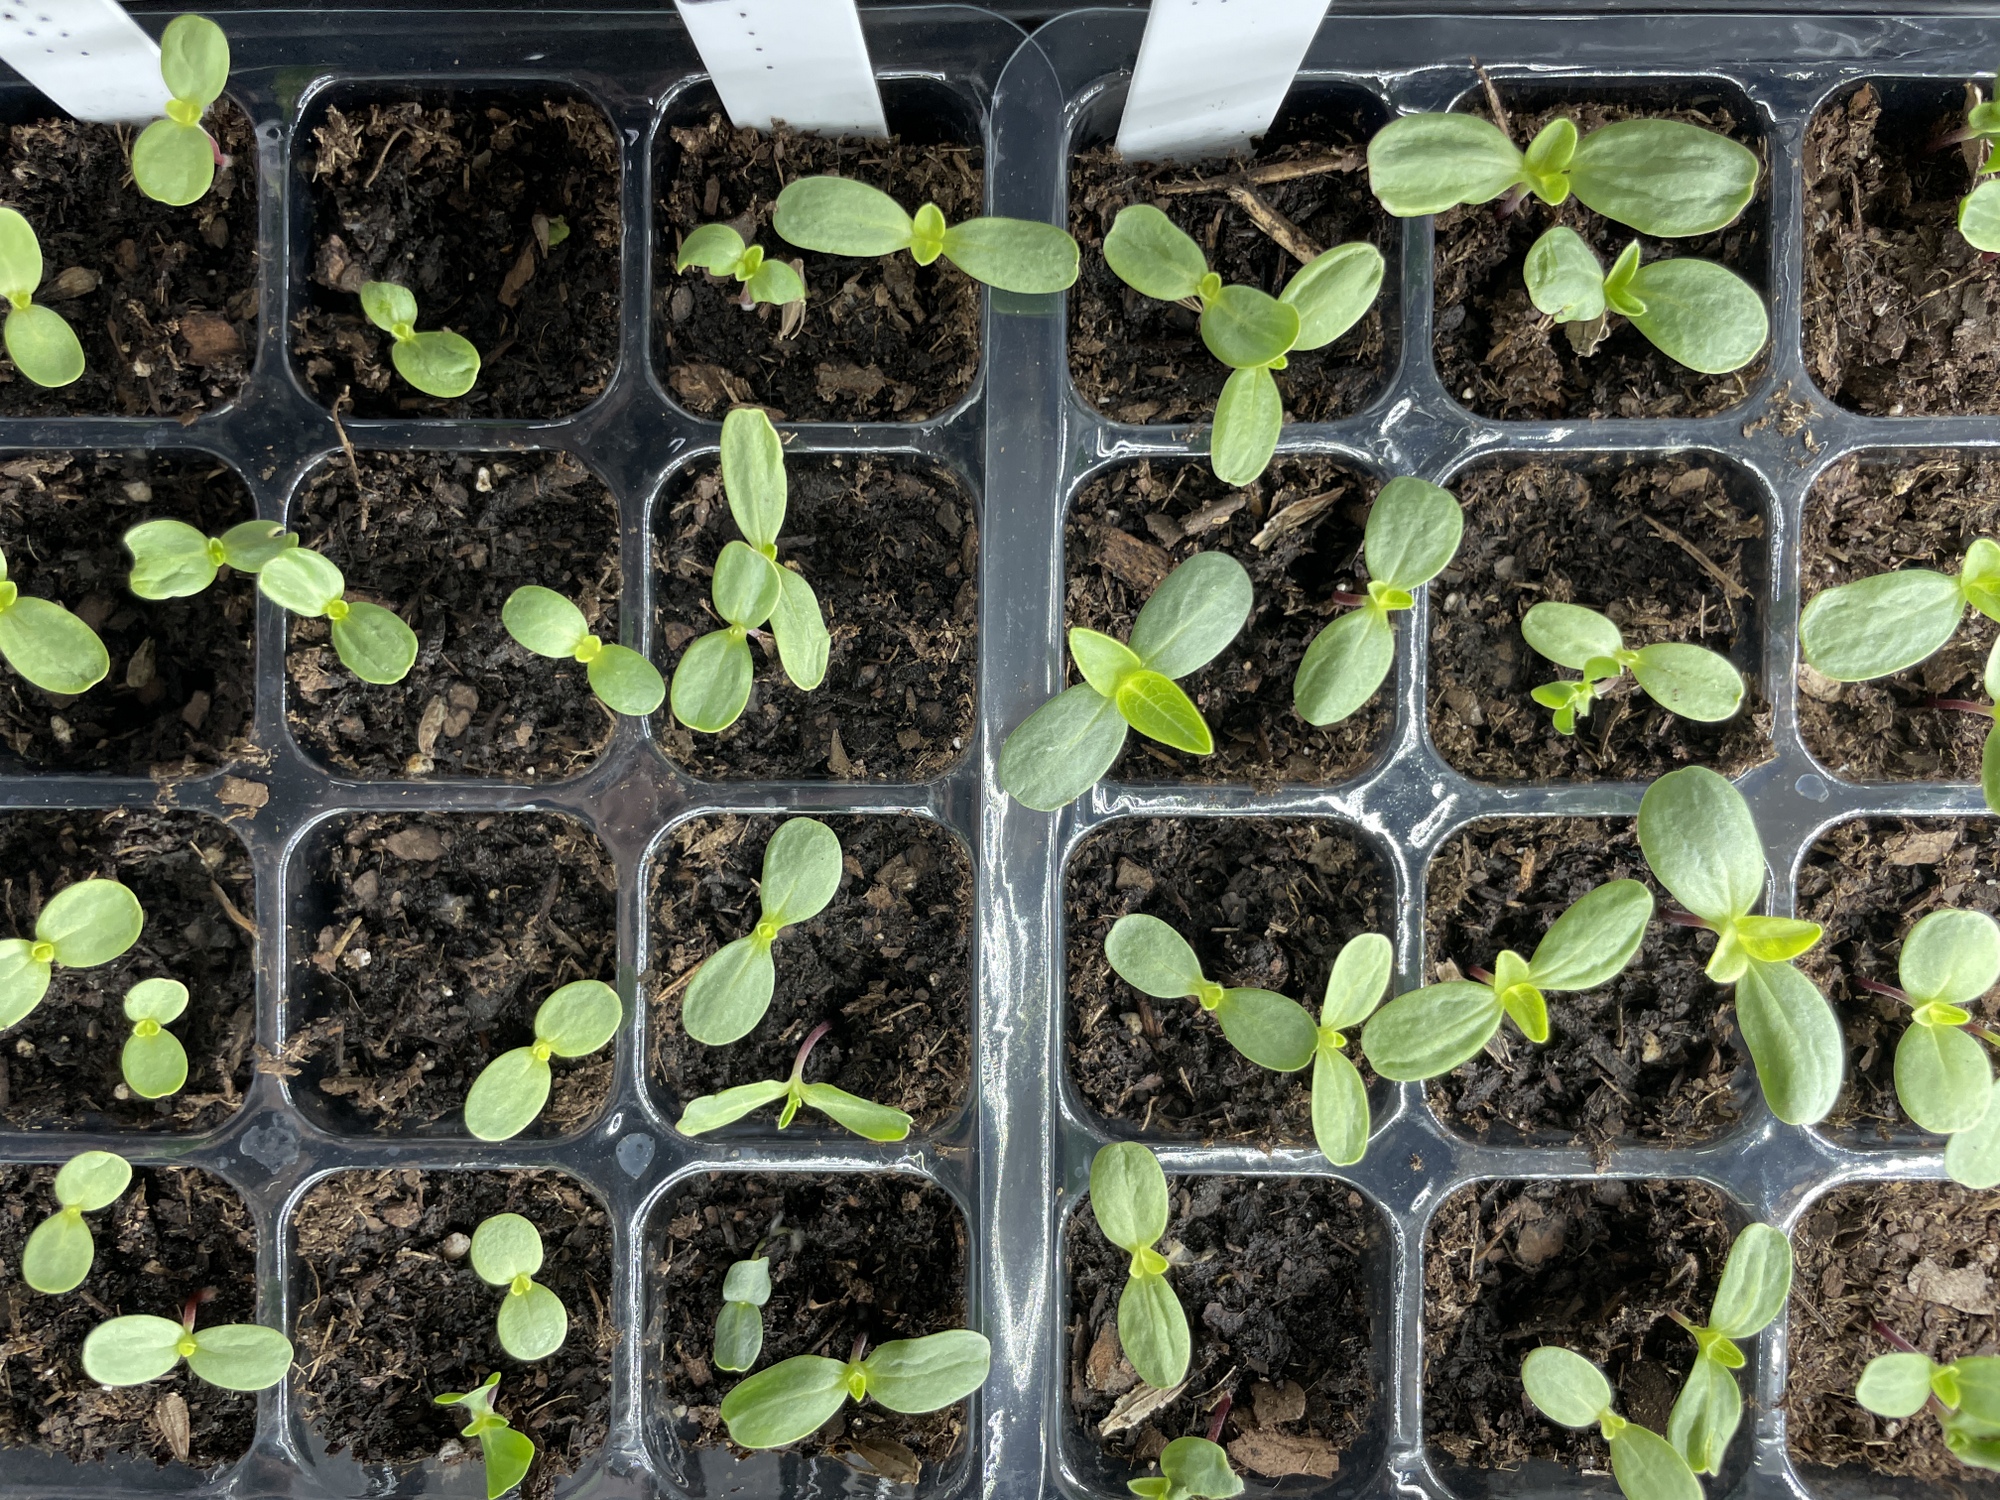
This is the easy and fun part.
- Fill your seed trays or pots with the starter mix or potting soil.
- Write the name of the plant on plant markers and place them before planting the seed. This is important! With so many seeds and pots, you can confuse yourself quickly. Mark first and then add the seed.
- Consult the seed packet for the planting depth. I usually just press my finger into the soil a little and then scoot the dirt over to cover it.
- Water them.
- Cover with a humidity dome or plastic wrap. This is not strictly necessary, but it can help with germination.
- Once they sprout, make sure your lights are on. The lights need to be on at least 12 hours per day, but the plants will grow the best with 16-18 hours per day.
Related Articles
Grow with me
See my other garden or wildlife posts.
Get new posts in your inbox by subscribing.
Follow on Instagram.